After knowing the importance of layout managers, FlowLayout and BorderLayout, let us study the other layout manager – GridLayout.
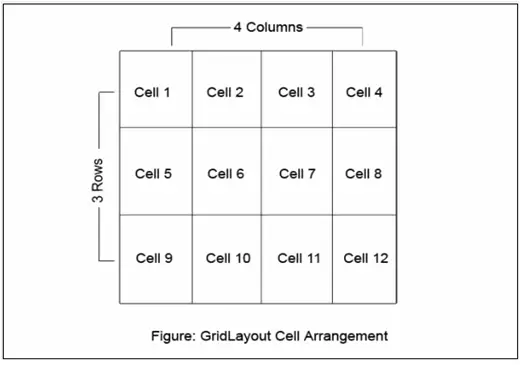
As the name indicates the container is divided into a grid of cells dictated by rows and columns. Each cell accommodates one component. Like with FlowLayout, in GridLayout also, the position need not be mentioned. But remember, in BorderLayout, position is to be mentioned. As the rows and columns are fixed, components addition goes one after another automatically. Following is an example of GridLayout of 3 rows and 4 columns (12 cells).

Following are the properties of GridLayout.
- The grid layout size (no. of cells) is given by rows and columns.
- The default gap between the components is 0 pixels which can be changed explicitly.
- Components should be added continuously. It is not possible to avoid some cells addition in the middle, and add to later cells.
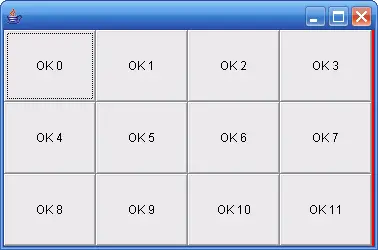
Following program illustrates the use of GridLayout.
import java.awt.*;
public class GLDemo extends Frame
{
  public GLDemo()
  {
    setLayout(new GridLayout(3, 4));
    setBackground(Color.red);
                        // create 12 anonymous button objects and add them
    for(int i = 0; i < 12; i++)
    {
      add(new Button("OK " + i));
    }

    setSize(350, 300);
    setVisible(true);
  }
  public static void main(String args[])
  {
    new GLDemo();
  }
}

Pages: 1 2